
Are you doing heel raise exercises as part of your workout? If you’re not, maybe it’s time you should.
Your body does squats each time you sit down or get up. By contrast, your calf muscles don’t get much of a workout.
But calf muscles play a key role in many everyday activities, from walking to climbing steps. Working them out can put a spring in your step. It can also make running easier.
In today’s post, we explain what heel raises are and how to do them correctly. We’ll also show you variations you can try once you master the basic exercise.
In This Article:
What Is the Heel Raises Exercise?
The heel raise, also known as heel lifts or eccentric calf raises, is a simple bodyweight exercise. Doing it regularly will make your calves stronger. It can also lead to nicer-looking, better-toned calves.
Heel raises are a simple and convenient way to keep your calf muscles in good shape. You can do them almost anywhere. You can do the heel lift exercise as a standalone exercise or integrate it into your workouts.
Calf raises are very similar to eccentric heel drops. However, with the latter, you stand on a step or another elevated surface. You stretch your heel all the way down without touching the floor.
Some people also wonder about heel raises vs. toe raises. Toe raises work the muscles in the front of the shin, mainly the tibialis anterior. This muscle helps extend the toes and flex the foot up.
Which Muscles Are Worked by Heel Raise Exercise?
Heel raises work the gastrocnemius and soleus muscles in the calf area. Your body relies on these muscles each time you stand or walk.
More specifically, these muscles help bend the knee and allow the foot to point. When running, the calf muscles activate each time you push off the ground and raise your leg.
Weak calf muscles can make your legs feel slow and heavy. They may also affect your running speed and endurance.
The effects of weak calf muscles become especially noticeable as we age. Even if you train your other leg muscles, neglecting to exercise your calf muscles can leave you feeling you’re wearing heavy boots all the time.
Benefits of the Heel Raises
There’s more than one reason to do heel raises. From stronger calves to more stable ankles, here are the key benefits of this simple exercise.
Strengthen calves
Heel raises make your calf muscles stronger. Stronger calf muscles support everyday movements such as climbing steps, walking, jumping, or reaching for that jar on the topmost shelf.
Get more shapely calves
Ever noticed how beautiful the calves of ballet dancers are? That’s because ballet dancers do tons of heel raises – just about every time they stand on their toes.
Makes your ankles stronger and more stable
The calf muscles give support to the foot and ankle. Working them out is one way to improve support during everyday activities and stay safe when running or jumping.
Helps manage Achilles tendonitis
The heel raise or lift exercise enables you to place a healthy load on your Achilles tendon. This, in turn, could help reverse the unhealthy load on the tendon that results from a tendon condition.
Studies suggest that heel lifts for Achilles tendonitis may work. But you want to be careful not to place too much load on your Achilles tendon too suddenly, especially if you’re in pain.
Reduce running injuries
Working out your calves helps you develop more balanced muscle groups in the legs. Add to this the healthy tendon load and the ankle stability improvement, and heel raises can help you avoid becoming sidelined.


To reap the benefits of this exercise, it’s important to do it correctly. You don’t want to push yourself too much too soon.
How Often Should You Do Heel Raises?
Start with just one set every day. You can then progressively increase the number of heel raise reps and sets from one week to the next, up to 3 workouts of 3 sets each a week.
Aim for 8 to 15 repetitions and up to 3 sets at a time. In between sets, allow yourself a short rest.
If you’re doing other calf or ankle exercises, you may want to reduce the number of heel raises. Factor in your current training plan if you follow one.
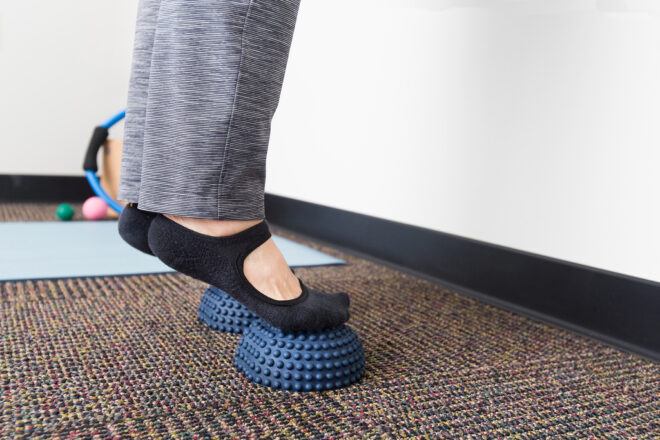
How to Perform the Basic Heel Raise Exercise
The best place to do heel raises is on a flat, non-slippery surface. Use a wall, table, countertop, or the back of a chair for support.
1. Place your feet flat on the floor. Your feet should be under your shoulders.
2. Place one or both hands on the support to steady yourself.
3. Raise both your heels with a slow movement so that you’re standing on your toes.
4. Maintain the raised position for at least one second.
5. Lower your heels slowly back to the floor with a controlled movement.
6. Repeat 8 to 15 times.
Important: If you do more sets than one, allow a short, 2-minute recovery break in between them.
Tip: You can combine squats with heel raises in a squat with the heel raise exercise. Start with feet a little wider than hips. Squat and then lift your legs so that your heels are off the floor.
What to Avoid During Heel Raises?
Because the heel raise exercise is so simple, it’s easy to rush it. But to enjoy all its benefits, maintaining a slow and controlled movement is important. To get heel raises right, avoid the following common mistakes.
- Not going up and down fully. This is crucial to maximizing ankle mobility.
- Bouncing and jerking. Move slowly and retain control during all stages of the exercise. Don’t bounce once your heel touches the floor.
- Not supporting your body with your hands. While you can do heel raises without support, holding on to a table or wall helps stabilize you. It makes it easier to do the exercise correctly.
- Doing the exercise if you feel pain. If you already have leg pain or experience pain during the exercise, stop the exercise. Rest until the pain goes away. If the pain continues, talk with your doctor.
- Avoid arching your back or locking your knees. Stand straight with feet apart. Your posture should feel natural and comfortable, not strained in any way.
- Not wearing flat shoes on a hard surface. You can do the exercise without shoes on a soft surface. On a hard surface, wear shoes for comfort. But avoid running shoes or trainers with a high heel. They can limit the range of the heel raise.
Good to know: It’s normal to feel tension and strain in your calf muscle during this exercise. You’ll also feel the load on your Achilles tendon. But heel raises should not be painful. If you experience pain, stop at once.
Variations to Heel Raises
Once you master basic heel raises, you can move on to more challenging variations of the exercise.
Aim to do three sets of 15 reps of the basic heel raise exercise described above. Once you’re comfortable with that, you can take your heel raises to the next level.
Let’s take a closer look at some variations to the heel raise exercise you can try.
Double heel raise with weights
For this one, you can hold a dumbbell in one hand or use a weighted vest or belt. If you don’t have any of these, you can fill a backpack with some books.
Make sure you don’t make it too heavy, though. You want to avoid back strain.
1. Hold the dumbbell or put on the weighted item.
2. Use one hand for support.
3. Place your feet at shoulder width and balance your weight on them.
4. Raise both heels off the ground with a slow movement.
5. Hold for one second at the top.
6. Lower both heels at the same time.
7. Start with 1–2 sets of up to 15 reps each. Work towards 3 sets of 15 reps each.
Important: The weight you use should feel comfortable and not cause you pain.
Single-leg heel raise exercise
The single-leg heel raise is a bodyweight exercise. You don’t need any extra weights to do it. The instructions are similar to the basic version of the heel raise, only that you raise one leg at a time.
1. Begin in the standard position, with feet under shoulders.
2. Support yourself with one or both hands.
Try Joggo for FREE
We combined exercise and meal planning for the most effective way to LOSE WEIGHT.
3. Shift all your weight to one leg.
4. Bend the other leg at the knee so that it doesn’t touch the ground.
5. Raise the heel of the standing leg off the floor slowly.
6. At the top, hold the position for one second.
7. Bring the heel down carefully.
8. Do up to 15 reps and then switch legs.
9. Build up to 3 sets of 15 reps each for each leg. In between sets, rest for 2 minutes.
Can’t do a single-leg heel raise? If you’re injury-free, it means you need to work your calves a bit more with the double leg heel raise exercise. Add weights for a tougher workout. In time, you’ll be able to do single-leg raises.
Weighted single-leg heel raise
Plan on running hill sprints or doing tough hikes? The weighted single-leg heel raise is going to beef your calves for the effort to come.
For this exercise, you can use a weighted vest or backpack. Or a dumbbell you hold in one hand. Basically, the same weights as for a double heel raise with weights.
1. Put on the weighted item.
2. Stand with feet at shoulder width.
3. Support yourself with one hand or both. (One hand if you use a dumbbell).
4. Shift your weight to one foot and bend the other at the knee.
5. Raise your heel off the ground carefully.
6. At the top, maintain the position for one second.
7. Bring the heel down with a controlled movement.
8. Repeat for up to 15 reps and then switch legs.
9. Aim for up to 3 sets of 15 reps each for each leg.
Takeaways
In the end, here are the key things to remember.
- Heel raises strengthen your calf muscles, improve ankle mobility, and increase stability.
- Start with basic heel raises, and then you can progress to weighted calf raises and single-leg calf raises.
- Do calf raises 2–3 times a week to see results, up to 3 sets of 15 reps each.
- Do the exercise slowly, with a controlled movement, and hold at the top for one second.
So, what are you waiting for? Raise your heels and work those calves!
Frequently Asked Questions
What are heel raises good for?
Heel raises are a great exercise for strengthening the calf muscles, which are located in the back of the lower leg. The calf muscles are responsible for plantar flexion, which is the movement of lifting the toes off the ground. Strong calf muscles are important for stability, balance, and posture. They are also important for activities that require running, jumping, and climbing stairs.
Are calf raises and heel raises the same thing?
Yes, calf raises and heel raises are the same thing. The term “heel raise” is more commonly used in the United States, while the term “calf raise” is more commonly used in the United Kingdom.
How do you do a heel raise?
There are two main ways to do a heel raise:
- Standing calf raise: Stand with your feet shoulder-width apart and your toes pointing forward. Slowly raise your heels up off the ground as high as you can, keeping your toes flexed. Hold for a second at the top, then slowly lower your heels back down to the ground. Repeat 10-15 times.
- Single-leg calf raise: Stand on one leg and raise your heel off the ground as high as you can, keeping your toes flexed. Hold for a second at the top, then slowly lower your heel back down to the ground. Repeat 10-15 times on each leg.
What are the benefits of single leg heel raises?
Single-leg heel raises are a more challenging variation of the standard heel raise, which makes them a more effective exercise for strengthening the calf muscles. They also help to improve balance and coordination.
Here are some additional benefits of heel raises:
- Improves ankle mobility
- Reduces the risk of ankle sprains
- Helps to prevent shin splints
- Improves posture
- Strengthens the arch of the foot
- Enhances athletic performance
References:
- Flanagan, S.P., Song, J.E., Wang, M.Y., Greendale, G.A., Azen, S.P. and Salem, G.J., 2005. Biomechanics of the heel-raise exercise. Journal of aging and physical activity, 13(2), pp.160-171.
- Riemann, B.L., Limbaugh, G.K., Eitner, J.D. and LeFavi, R.G., 2011. Medial and lateral gastrocnemius activation differences during heel-raise exercise with three different foot positions. The Journal of Strength & Conditioning Research, 25(3), pp.634-639.
- Arnsdorff, K., Limbaugh, K. and Riemann, B.L., 2011. Analysis of heel raise exercise with three foot positions. International journal of exercise science, 4(1), p.13.
- Amirhamzeh, M.M.R., Chant, H.J., Rees, J.L., Hands, L.J., Powell, R.J. and Campbell, W.B., 1997. A comparative study of treadmill tests and heel raising exercise for peripheral arterial disease. European journal of vascular and endovascular surgery, 13(3), pp.301-305.
- Nagano, A., Fukashiro, S. and Komura, T., 2003. Contribution of series elasticity in human cyclic heel-raise exercise. Journal of Applied Biomechanics, 19(4), pp.340-352.
- Akuzawa, H., Imai, A., Iizuka, S., Matsunaga, N. and Kaneoka, K., 2017. The influence of foot position on lower leg muscle activity during a heel raise exercise measured with fine-wire and surface EMG. Physical Therapy in Sport, 28, pp.23-28.